Ice Dispenser Repair For GE Refrigerators
This page will walk you through the steps in ice dispenser repair for GE
refrigerators. There are two basic styles of ice dispensers on GE refrigerators:
one was on GE side-by-side refrigerators made before 2002 (old style) and the
other is on electronic side-by-side GE refrigerators made after 2002 (new
style). Dispenser repair for these two styles are different and both are
discussed on this page. This page covers mechanical disassembly of both ice
dispensers.
It’s easy! Just find the model number of the appliance you are working on. Next,
type it in to the model number box and it will take you to an illustrated parts
diagram for your appliance. Then just simply choose the part you need from the
diagram.
Refrigerator Won’t Dispense Ice
The first thing you need to determine is if the problem is electrical or
mechanical. To do this press the button to get ice, if you hear a noise and the
ice dispenser doesn’t work the problem is mechanical and if you don’t hear any
noise the problem is electrical. If you determine the problem is electrical click here For
information on electrical ice dispenser repair. Look in the ice chute and see if
ice is getting hung in there. If so the problem is in the ice chute (freezer
door) click here
for more on this.
If the problem is not the ice chute and not
electrical, the problem is either in the auger motor housing or the ice
dispenser bucket. To determine this, first remove the ice dispenser bucket,
select cubed ice, open the freezer door, press the door switch and press the
button to get ice. What should happen is the solenoid should lift up and the
auger motor (the fork at the back center) should turn. If the auger motor
doesn’t turn but the solenoid lifts up the auger motor is frozen or bad. Try to
thaw out it by removing it and blowing it with a hair dryer. Note that if you
have a new electronic GE refrigerator with serial number starting with AA2
through DZ2 this will probably happen again. Unfortunately they had a lot of
problems with the doors on these refrigerators letting too much moisture pass
through them. This causes the auger motor to freeze up. If everything in the
auger housing works properly the problem is in the ice dispenser bucket
Buy
appliance parts online and save.
Ice Dispenser Repair For New style GE Refrigerators
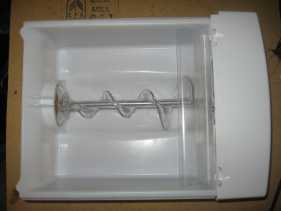
On these ice dispensers there are two things that causes the ice not to
dispense, the auger and the crusher cover. It is easy to determine which one it
is just by dumping all the ice and look. You should be able to see which one is
broken.
The crusher cover is the plastic divided that separates the ice storage from the ice crusher. The auger is the simply an auger that turns to force the ice from the ice storage to the ice crusher.
In this section of ice dispenser repair guide I will show you how
to disassemble the new style ice dispenser bucket so that you can replace the
crusher cover and the auger or any other part you need to replace.
Crusher Cover
If the crusher cover is broken follow these steps to replace it.
1.
Remove the front cover off the ice dispenser bucket by removing the two screws
on the bottom front.
2. Remove the screw at the top of the crusher
inside the bucket.
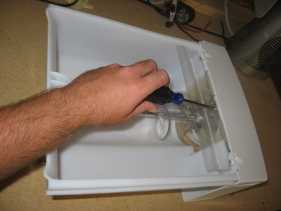
3. Using two screwdrivers prize up on the crusher separating the crusher from
the ice bucket.
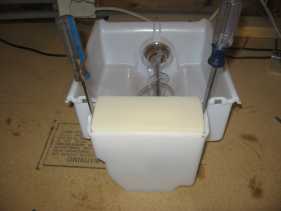
4. Once the crusher is up out of the ice bucket about an inch, pull up on the
metal lever so that it will clear the flapper allowing the crusher to lift up
and out.
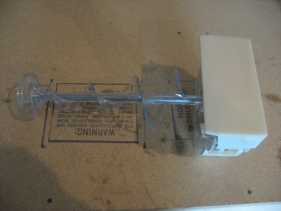
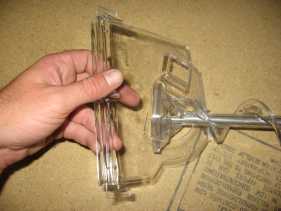
5. Once the crusher is out of the ice bucket, the crusher cover
will slide up and over the auger.
 |
 |
Auger
Continue if you are replacing your auger.
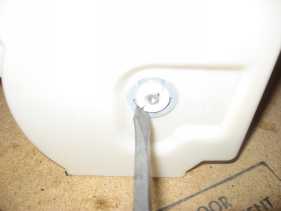
6. Using a screwdriver, remove the e-clip from the front of the crusher.
7. Pull the auger and crusher blades out of the crusher housing.
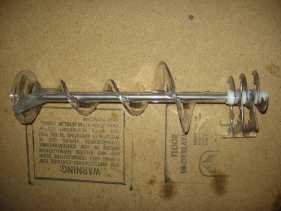
8. Unscrew the white plastic nut off the front of the auger. Note that this nut
is left-hand thread.
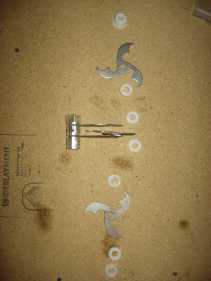
9. Remove the washers and the blades and place them
on the table in the order in which you removed them. So that when you reinstall
them you know what order they go in. I like to lay them on the table with the
side that was facing out up. This way I not only know what order they go in, I
know what way they face.
Accessing Dispenser Door Parts On A GE Side-by-Side
Disconnect power to the refrigerator. Then use a flat screwdriver to prize the
dispenser board off. Then unplug the dispenser board.
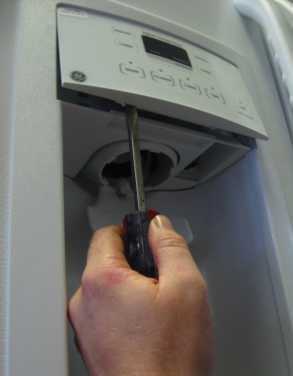
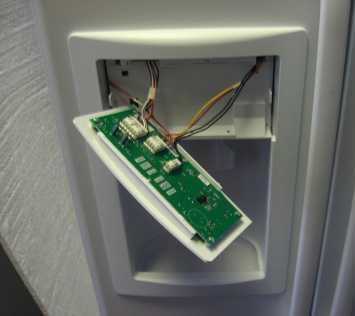
Once the dispenser board is off remove the four screws that hold the housing on.
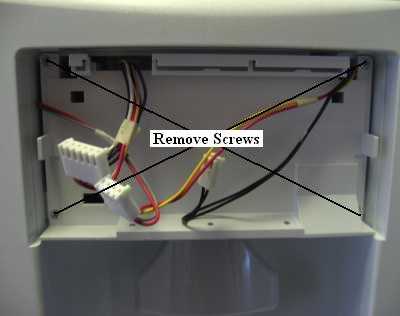
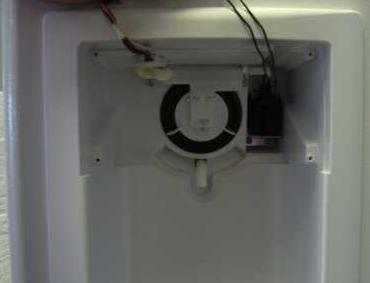
Then you should be able to access the flap and the solenoid.
Ice Dispenser Repair For Old Style GE Refrigerators
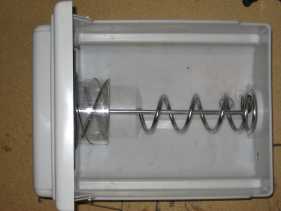
On these old style dispensers just about the only thing that would break was
the helixes (round clear plastic drums). Note that some of these ice dispensers
have two of these parts and some have one but if you replace them you will have
to replace it with one and you will have to replace the auger as well. All the
parts necessary to do this come in a kit that you will receive if you order the
helix. If this part breaks the auger will turn but the helix will not. Thus, the
ice will not move from the ice bucket to the crusher. In this section of ice
dispenser repair guide I will show you how to disassemble the old style ice
dispenser bucket so that you can replace the helix or any other part needed.
1. Remove the front cover off the front of the ice dispenser
bucket.
2. Remove the clip off the front of the crusher housing.
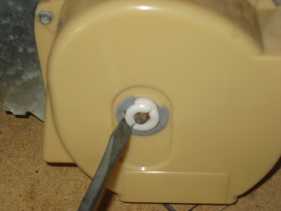
3. Remove the crusher housing leaving the blades and the auger behind.
4. Remove the nut off the end of the auger.
5. Remove the
washers and the blades and place them on the table in the order in which you
removed them. So that when you reinstall them you know what order they go in. I
like to lay them on the table with the side that was facing out up. This way I
not only know what order they go in, I know what way they face.
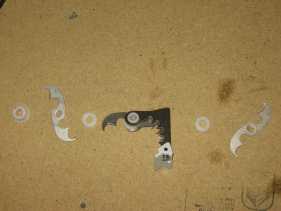
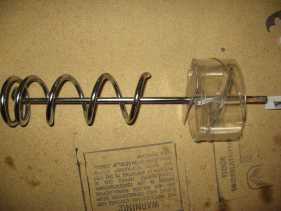
6. Once the blades are off you can remove the auger and helix and install a new
kit.
Refrigerator Dispenses Crushed Ice Only
In this section of ice dispenser repair guide I will talk about what to do if
your ice dispenser will dispense crushed ice only. The main thing what will
cause this is the solenoid inside the auger motor housing is either bad or
frozen. Remove the ice dispenser bucket, select cubed ice, open the freezer
door, press the door switch and press the button to get ice. What should happen
is the solenoid should lift and the auger motor should turn. If when you do this
the solenoid doesn’t lift up, it is either bad or frozen. In any case, you need
to replace it. You can try to thaw out it by removing it and blowing it with a
hair dryer. Note that if you have a new electronic GE refrigerator with serial
number starting with AA2 through DZ2 this will probably happen again.
Unfortunately they had a lot of problems with the doors on these refrigerators
letting too much moisture pass through them. This causes the auger motor and the
solenoid to freeze up.
I hope this ice dispenser repair guide made
repairing the ice dispenser on your GE refrigerator easy.
Return from ice dispenser repair guide