Ice Building Up In Freezer Repair Guide
Is ice building up in your freezer? If so this refrigerator repair guide can
walk you through the steps it takes in repairing your refrigerator. These are
the same steps I take when repairing appliances professionally. So if you follow
these steps your problem will be solved in no time. Take the time to read each
section carefully until your refrigerator is repaired.
Defrost
If there is a problem with the defrost system, there will be frost build up on the evaporator cover (the back of the freezer or on some refrigerators the bottom of freezer). If it’s a defrost problem click here to learn more on defrost.
Or this page may help more
Refrigerator Door Gasket
If the door gasket is bad, you will get frost build up around the door of the freezer and sometimes on the packages. To check the door gasket, first close the door to see if there are any gaps between the gasket and the refrigerator (rule of thumb - if the gap is big enough to slide paper in it is too big). If you have small gaps you can try rubbing Vaseline all the way around the gasket this may fix your problem. If the gasket is ripped or the Vaseline doesn’t fix it replace gasket. Refrigerator door gaskets can be found at AppliancePartsPros.com.
Freezer Door Left Open
Ice will build up all over the freezer if the door was left open. If you
suspect the door was left open then clean the ice, close the door and your
problem is fixed. If the door will not stay closed try this page Refrigerator
door repair
Ice Chute
If there is ice building up around the ice chute (the hole that the ice dispenses through) then something is wrong with the ice flapper (the flap that closes the ice chute). First look to see if it is closed all the way. If not take the ice bin out. Now push the switch to get ice and watch to see what the flap is doing. If it opens and closes but not all the way, look to see if anything is blocking it.
If not, it’s the flap, the spring, the crank, or the solenoid (the device that opens the flap). Now you need to remove the front cover off the dispenser (on most refrigerators it just snaps off). Then remove four screws behind the cover and remove the dispenser control. Once off you should see the flap. Inspect the spring to see if it is broke or out of place, if so, replace it. Then see if the crank (the part that the flap is attached to) is broke, if so, replace it. Now look at the flap to see if the edges are rolled over or is broken, if so, replace it.
Now for the solenoid, sometimes it gets rusty and won’t close all the way. Sometimes it overheats and welds itself open, if this happens it won’t open or close. In any case, if it doesn’t open or close properly replace it.
If your solenoid is rusty and you have a GE refrigerator with serial number starting with AA2 through DZ2, the doors on the refrigerator (fresh food doors and freezer doors) need to be replaced. Up until March 2008, GE was replacing the doors free of charge. These parts can be found at AppliancePartsPros.com.
Accessing Dispenser Parts On A GE
Side-by-Side
Disconnect power to the refrigerator. Then use a flat screwdriver to prize
the dispenser board off. Then unplug the dispenser board
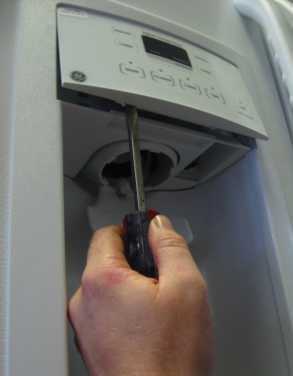
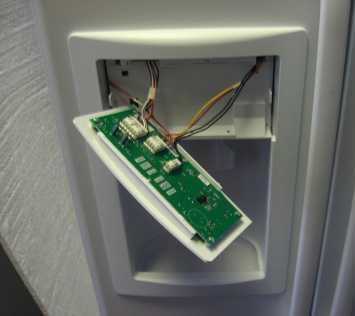
Once the dispenser board is off remove the four screws that hold the housing
on.
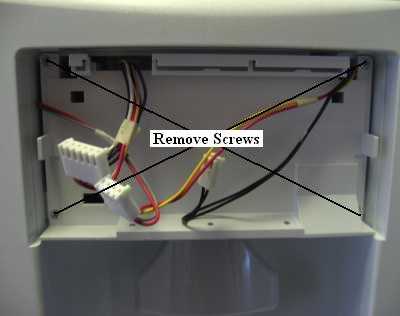
Then you should be able to access the flap and the solenoid.
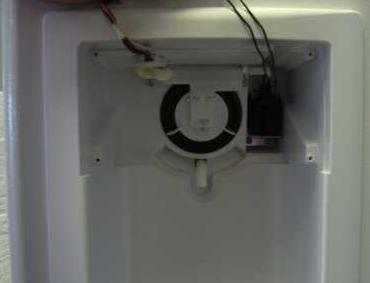
Accessing
Whirlpool Ice Dispenser Door Parts
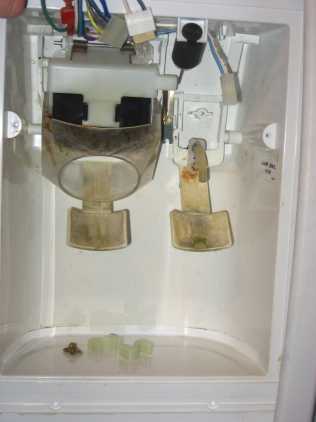
Sometimes the actuator that holds the flap on Whirlpool ice chutes will break cause ice building up issues.
First disconnect power to refrigerator then prize
the dispenser panel off by inserting a screwdriver into the bottom and gently
prizing it until it pops loose. Sometimes it is necessary to prize a little near
the top but if possible do all the prizing from the bottom.
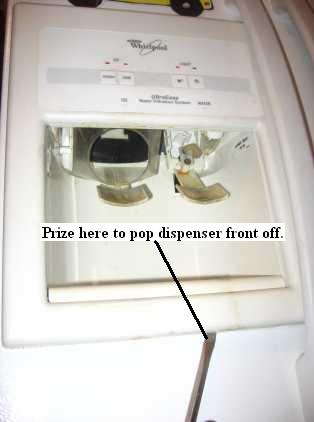
Then unplug the wires.
Note that on some Whirlpool ice dispenser models there is one single plug but on others you have to unplug several wires. Make sure you know where to reconnect the wires by drawing a diagram.
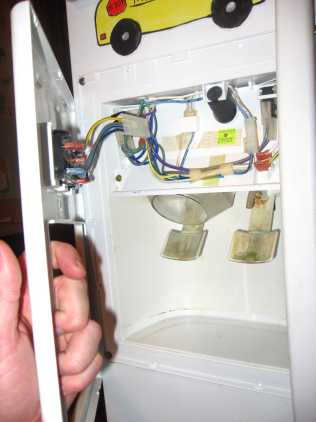
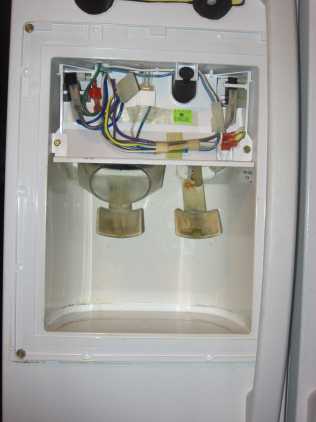
Now remove the screws that hold the housing on and remove the
housing.
Some Whirlpool ice dispenser models don’t have screws just two clips. Be careful not to over bend the clips because the will break.
I hope this page helps you solve your ice building up issues.
Return From Ice Building Up In Freezer Repair Guide